
Supplies
- FloraCraft® CraftFōM®:
- (6) 1.75 Inch x 2.4 Inch Egg - White
- White Chalk
- Chalkboard Paint:
- Teal
- Basil
- Violet
- 18" Burlap Ribbon
Tools
- Plastic Wrap
- Knife
- Scissors
- Smooth Finish™
- Paintbrush
- Sandpaper
- Newspaper
- Cardboard Box
Instructions
- Set a piece of plastic wrap on the table. Use Foam Tools, Knife (smooth side) to apply Smooth Finish™ onto each egg, as smoothly as possible. Set eggs on plastic wrap to dry.
- When totally dry, use sandpaper to sand eggs to smooth as needed. (Note: If any areas are thin or need a new application of Smooth Foam, simply go right over the top of the first layer, where needed. When dry, sand.) Clean up with water. Wipe off eggs to remove all sanding dust. Let dry.
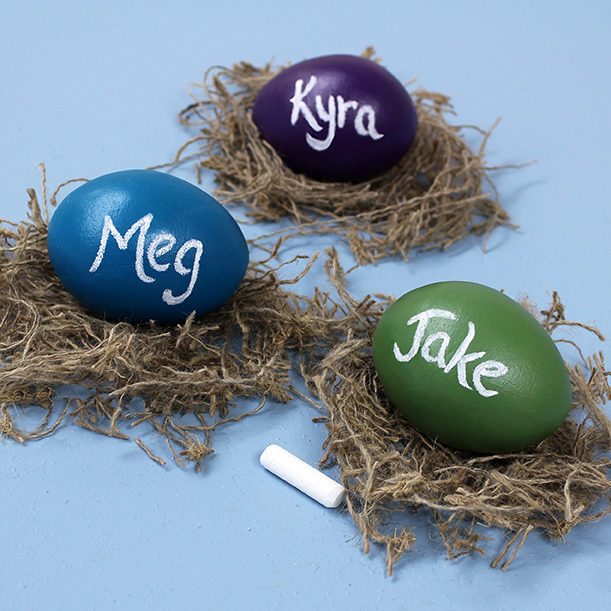
- In a well-ventilated, newspaper-covered area (inside box) lightly spray each egg with two coats Teal, Basil, or Violet. Let dry.
- For the nest, cut 18″ length burlap ribbon into 1/2″ x 18″ strips. Gently knead and scrunch strips together to form a nest shape for each egg. (Optional: Apply a little tacky glue to burlap and work it into fibers so that each nest will hold its shape. Set on plastic wrap to dry, and wash hands with water.)
- Use a paintbrush to apply two light coats of clear chalkboard coating on each egg. Let dry. Write names of dinner or luncheon guests in white chalk on colored eggs. Or write messages back and forth to family members before each meal.
-
 Birthday Gift Tumbler MugSkill level: Beginner
 -
 Birthday Era GarlandSkill level: Beginner
 -
 Kitchen Word ArtSkill level: Beginner
 -
 Front Porch ReindeerSkill level: Beginner
 -
 Disco Party DécorSkill level: Beginner
 -
 Jute Covered Disc Wall DécorSkill level: Beginner
 -
 Fabric Ruffled Chicken DecorSkill level: Beginner
 -
 Garden Bug FriendsSkill level: Beginner
 -
 Long Legged SpiderSkill level: Beginner
 -
 Glitter Anchor DécorSkill level: Beginner
 -
 Gold Glitter StarSkill level: Beginner
 -
 Haunted Mantle DecorSkill level: Beginner
 Subscribe


