
Supplies
- FloraCraft® CraftFōM
- 12" Extruded Wreath - White
- 18 yd. x 1/4" Sisal Rope
- 30 yd. Sisal Twine
- 24" x 8" Fishnet
- (14) Assorted Shells and Starfish
Tools
- Scissors
- Yardstick
- Glue Gun and Glue Sticks
Instructions
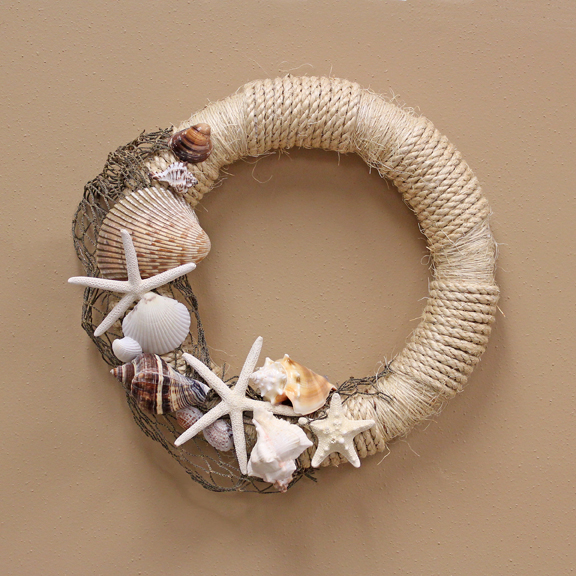
- To wrap the wreath, measure and cut 2 yds. length rope. Use a glue gun to attach the end of the rope to the back of the wreath. Wrap rope round wreath with coils side-by-side, spot gluing on back, every other wrap. (Note: As you wrap, the rope will tend to twist so allow the end to untwist itself every few wraps.)
- Cut 5 yd. length of twine. Similarly use a glue gun to attach the end of the twine to the back of the wreath next to the cutting end of the rope. Wrap twine around (without spot gluing) overlapping wraps on the inside of the wreath as needed, to cover 2″ outside and 1″ inside of the wreath. Spot glue the end of the twine. Repeat to cut and attach alternating lengths of rope and twine to cover the wreath.
- (Note: If there’s an uneven section, plan for this area to be covered with embellishments.) Referring to the photo, drape the fish net from the left side to the bottom of the wreath and spot glue in place.
- Place the wreath on the work surface and arrange the shells. Then, one at a time, lift, apply hot glue and replace.
- For the hanger, cut 3″ length twine. Determine position at the top, fold in half, and glue ends to the back of the wreath.
-
 Birthday Gift Tumbler MugSkill level: Beginner
 -
 Birthday Era GarlandSkill level: Beginner
 -
 Kitchen Word ArtSkill level: Beginner
 -
 Front Porch ReindeerSkill level: Beginner
 -
 Disco Party DécorSkill level: Beginner
 -
 Jute Covered Disc Wall DécorSkill level: Beginner
 -
 Fabric Ruffled Chicken DecorSkill level: Beginner
 -
 Garden Bug FriendsSkill level: Beginner
 -
 Long Legged SpiderSkill level: Beginner
 -
 Glitter Anchor DécorSkill level: Beginner
 -
 Gold Glitter StarSkill level: Beginner
 -
 Haunted Mantle DecorSkill level: Beginner
 Subscribe


