
Supplies
- FloraCraft® CraftFōM®:
- (1) 1”x12”x18” Sheet - White
- Flexible Foam Sheets:
- Red
- Blue
- Fabric:
- Red
- Blue
- Floral Print
- Acrylic Paint - White
- Puffy Paint - Blue
- Ribbon in Coordinating Colors:
- 1” Ribbon
- ½” Ribbon
Tools
- CleanKut FōM Cutter
- Low-Temp Glue Gun
- Scissors
- Paint Brush
- Plain Paper
- Pencil
- Spray Adhesive
- Straight Pins
Instructions
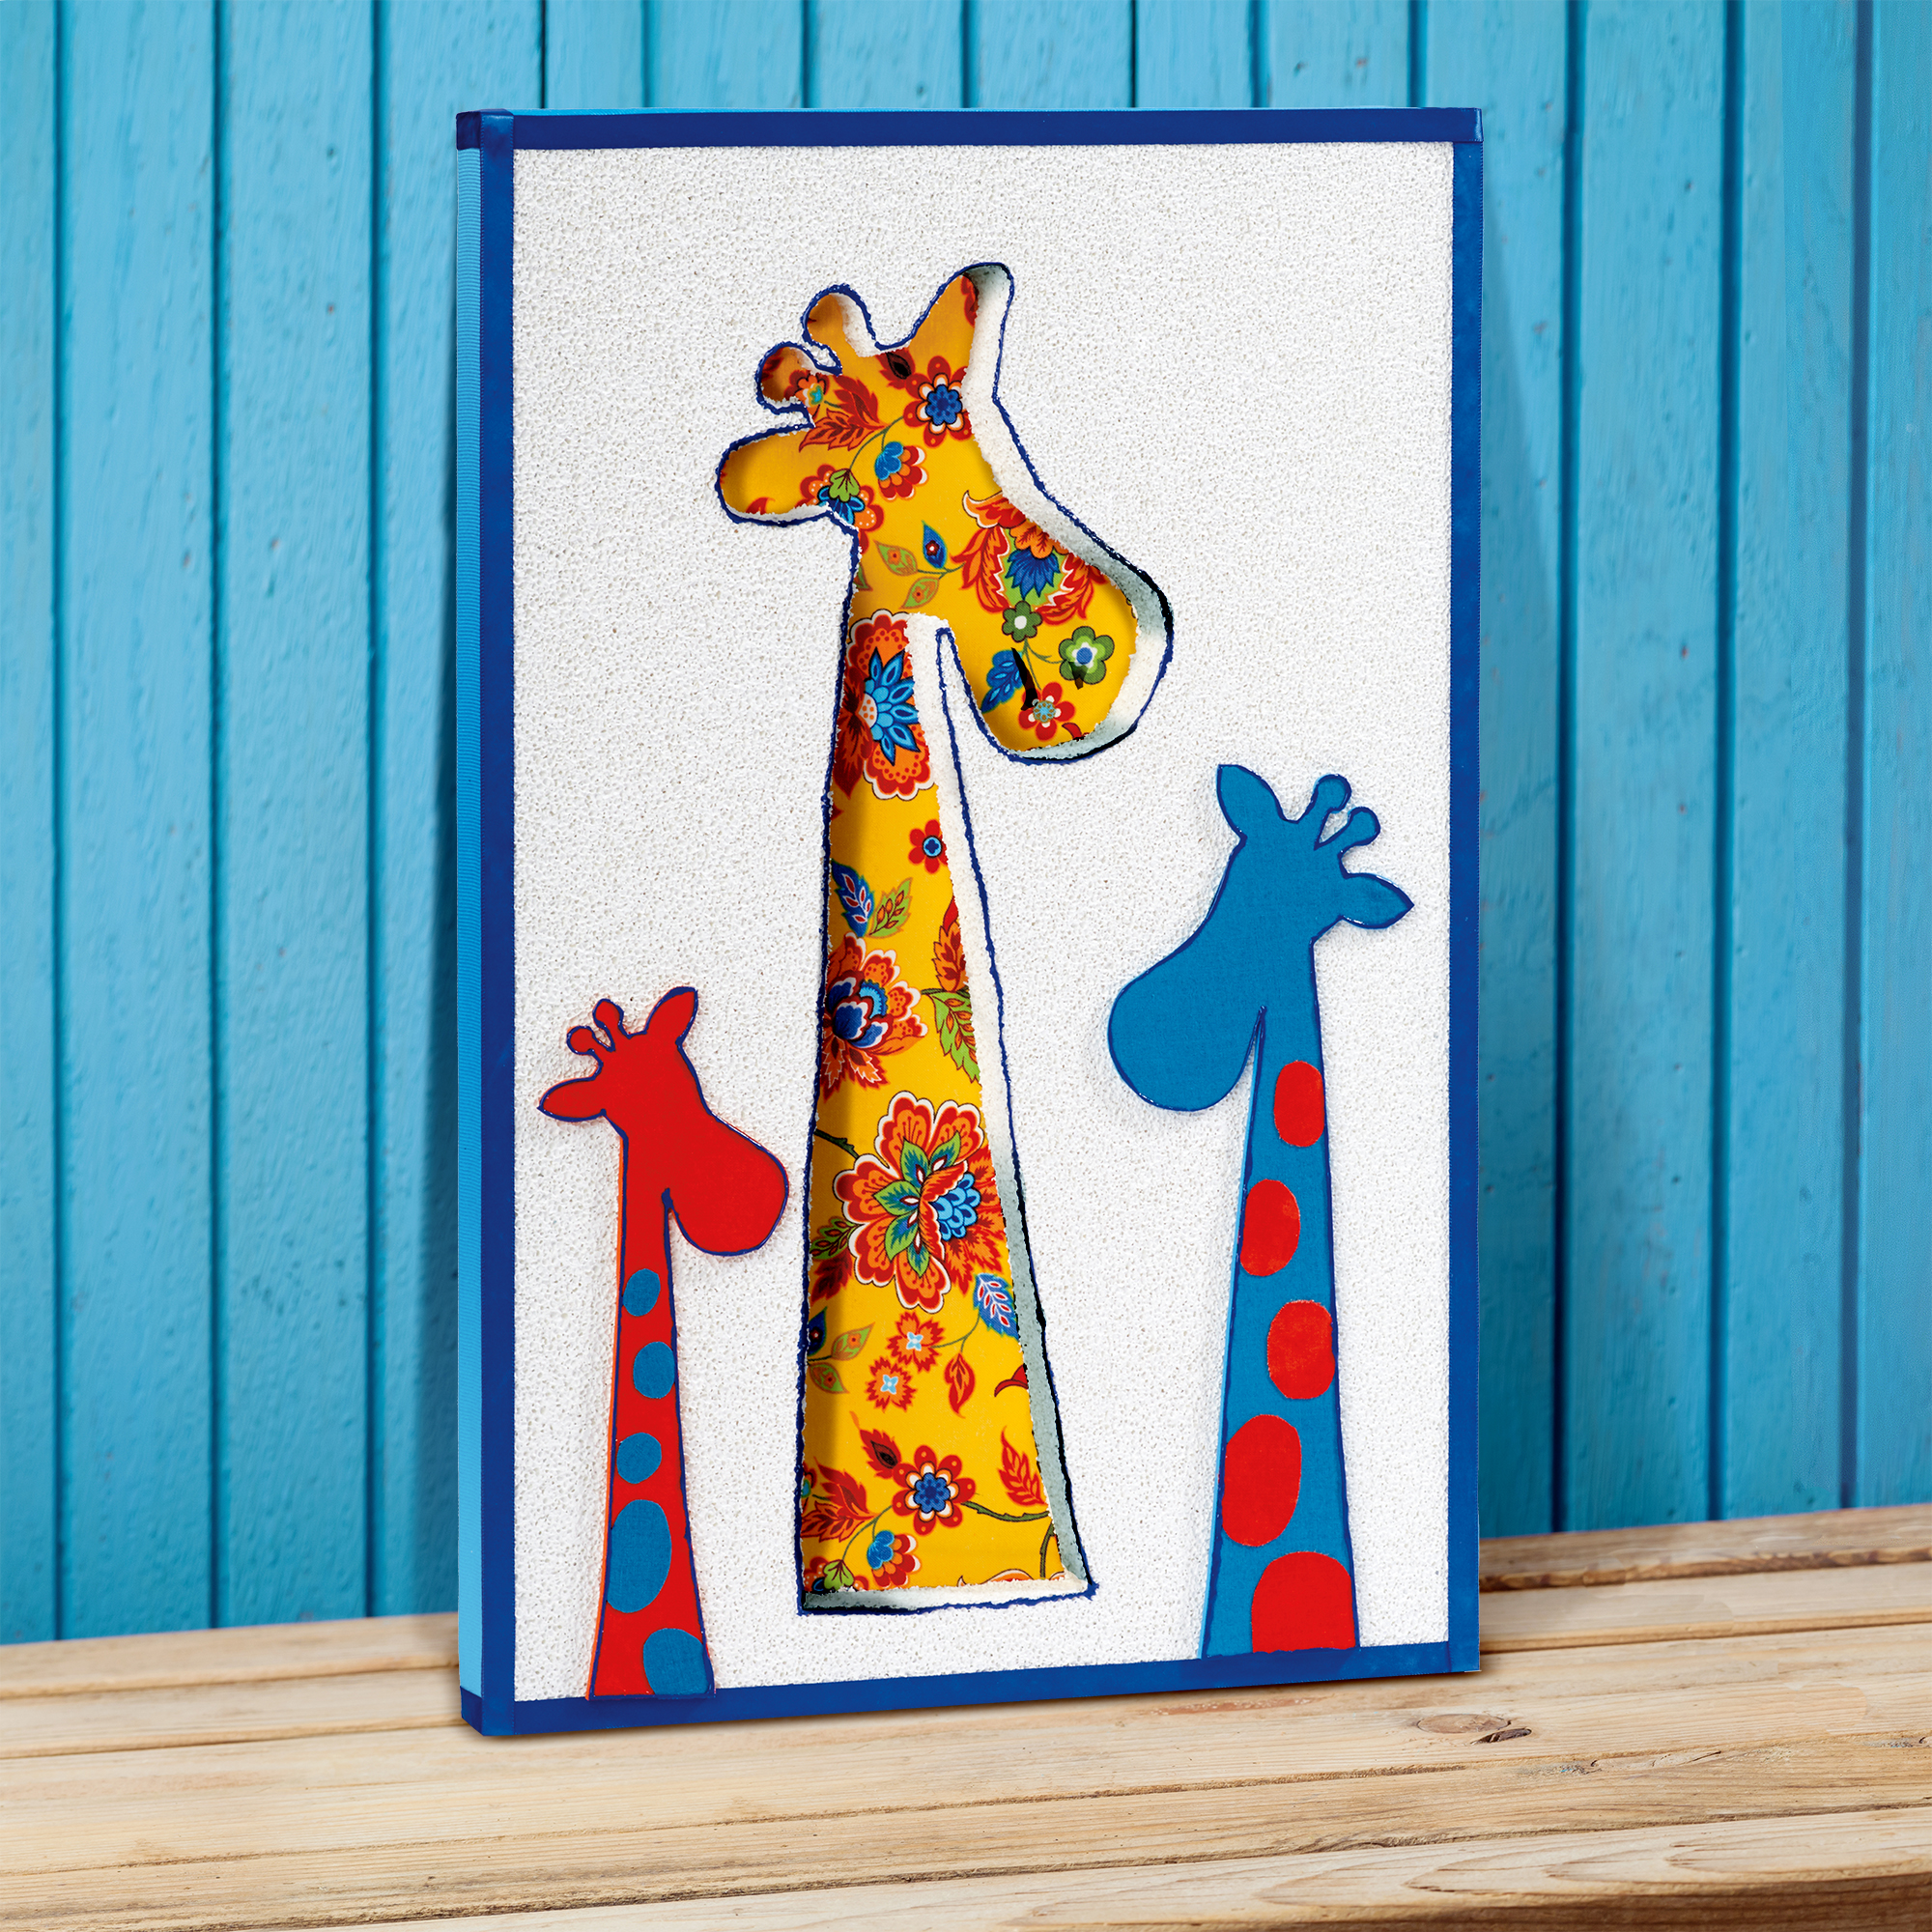
1. Find a giraffe silhouette template online like the one shown. Print out one template about 15” tall, one about 10” tall, and one about 8” tall. Cut out the templates.
2. Pin the 15” template to the center of the sheet about 1” up from the bottom. Use the FōM cutter as instructed on the packaging to cut out the template from the sheet.
3. Paint the FōM sheet white, be sure to paint the inside edge of the cut-out section. Let dry.
4. Cut a square of blue foam sheet big enough to fit the 10” template. Cut a piece of blue fabric this exact size. Use the spray adhesive to attach the material to the foam sheet. Repeat this process for the 8” template with the red foam and fabric. Trace the templates onto the blue and red fabric-covered squares. Cut out with scissors.
5. Cut out oval-shaped spots from the red and blue fabric and glue them in place along the giraffe’s necks.
6. Cut a square of floral print fabric big enough to cover the giraffe cut-out. Secure the fabric square in place on the back.
7. Use the blue puffy paint to paint a frame around each of the giraffes.
8. Glue the 1” ribbon around the outside edge of the FōM sheet. Glue the ½” ribbon to frame around the front edges of the FōM sheet.
9. Glue the blue and red fabric-covered giraffe cut-outs on either side facing the center.
-
 Birthday Gift Tumbler MugSkill level: Beginner
 -
 Birthday Era GarlandSkill level: Beginner
 -
 Kitchen Word ArtSkill level: Beginner
 -
 Front Porch ReindeerSkill level: Beginner
 -
 Disco Party DécorSkill level: Beginner
 -
 Jute Covered Disc Wall DécorSkill level: Beginner
 -
 Fabric Ruffled Chicken DecorSkill level: Beginner
 -
 Garden Bug FriendsSkill level: Beginner
 -
 Long Legged SpiderSkill level: Beginner
 -
 Glitter Anchor DécorSkill level: Beginner
 -
 Gold Glitter StarSkill level: Beginner
 -
 Haunted Mantle DecorSkill level: Beginner
 Subscribe


