
Supplies
- FloraCraft® CraftFōM®:
- Cones - Assorted Sizes
- Acrylic Paint:
- Bright Gold
- Antique Gold
- Copper
- Black
- Decorative Wire
- Battery Operated Light (Optional)
Tools
- Foam Cutter or Serrated Knife
- StyroCutter® Plus
- Cardstock Paper
- Paint Brushes
- Spoon
- Straight Pins
- Rubber Band
Instructions
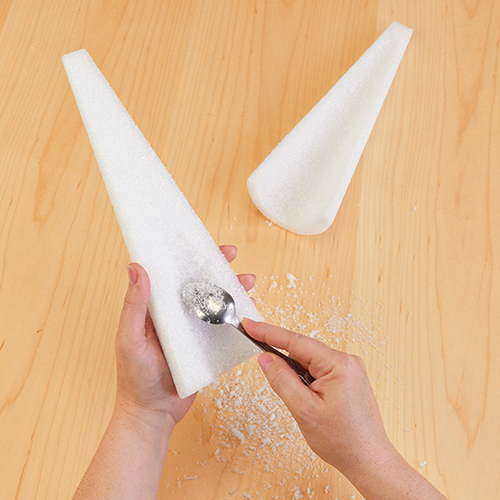
- Use the knife to cut the cone exactly in half lengthwise. Place a rubber band around the cone from top to bottom, dividing the cone in half. Use the rubber band as a guide to follow as you cut.
- Use the spoon to carefully scrape out the inside of all the half cones. Keep scraping out the inside until the hollow cone shell has a uniform thickness of about ½”.
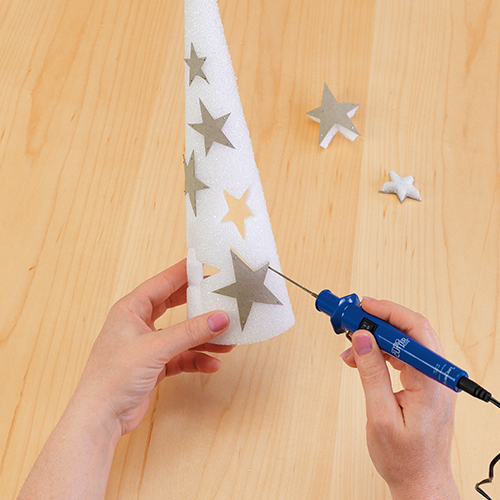
- Create templates by drawing stars onto the cardstock paper or print star templates from the internet. Cut out a 3” star, a 2” star, a 1.5” star, and a 1” star from the cardstock. Pin the stars in a random pattern onto the front half of the cone. Keep the stars at least ½” away from the edge of the cone and at least ½” apart.
- Use the StyroCutter® Plus to carefully cut out the stars, following the package instructions. Set aside the cutout stars to use inside the cone.
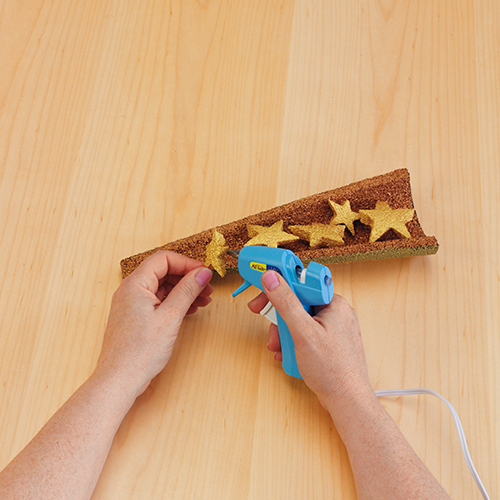
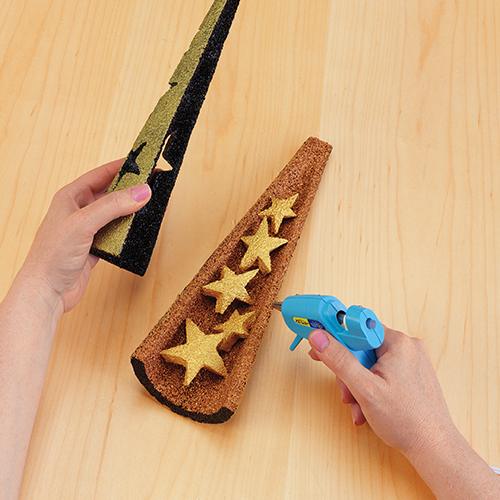
- Paint the inside of the front half, and the inside edges of the star cut out black and let dry. Paint the inside of the back half of the cone copper and let dry. Paint the cutout stars bright gold and lets them dry. Paint the outside of the cone your desired color.
- Glue the painted cutout stars inside the back half of the cone. Place the stars so that you can see their stars through the cutouts when the front half of the cone is in place.
- Glue the front back onto the back of the cones.
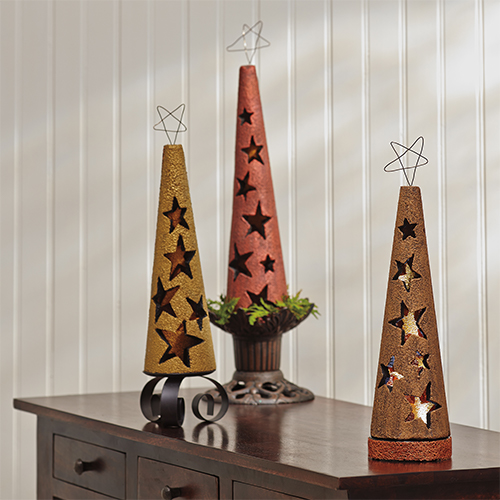
- Bend the wire into a star shape and glue the star to the top of the cone.
- (optional) Place a battery-operated light under the cones to add a glowing accent.
-
 Birthday Gift Tumbler MugSkill level: Beginner
 -
 Birthday Era GarlandSkill level: Beginner
 -
 Kitchen Word ArtSkill level: Beginner
 -
 Front Porch ReindeerSkill level: Beginner
 -
 Disco Party DécorSkill level: Beginner
 -
 Jute Covered Disc Wall DécorSkill level: Beginner
 -
 Fabric Ruffled Chicken DecorSkill level: Beginner
 -
 Garden Bug FriendsSkill level: Beginner
 -
 Long Legged SpiderSkill level: Beginner
 -
 Glitter Anchor DécorSkill level: Beginner
 -
 Gold Glitter StarSkill level: Beginner
 -
 Haunted Mantle DecorSkill level: Beginner
 Subscribe


