
Supplies
- FloraCraft® CraftFōM®:
- (1) 9" x 1 1/4" x 3/4" Wreath - White
- (4) 3" Balls - White
- (60) 1" Teardrop Shape Wood Pieces
- 1 1/2" Grosgrain Ribbon
- 33" White
- 16" Yellow with White Dots
- Acrylic Paint - Cadmium Yellow
- (2) Twist-Ties or Short Wire (To Bind Bows)
- 12" Any Color (Optional)
- 12" Cardboard (Optional)
Tools
- Transparent Tape
- Medium Paintbrush
- Serrated Knife
- Scissors
- Container of Water
- Paper Plate
- Paper Towels
- White Craft Glue
- Glue Gun and Glue Sticks
- Cutting Mat
- Large Paperclip
Instructions
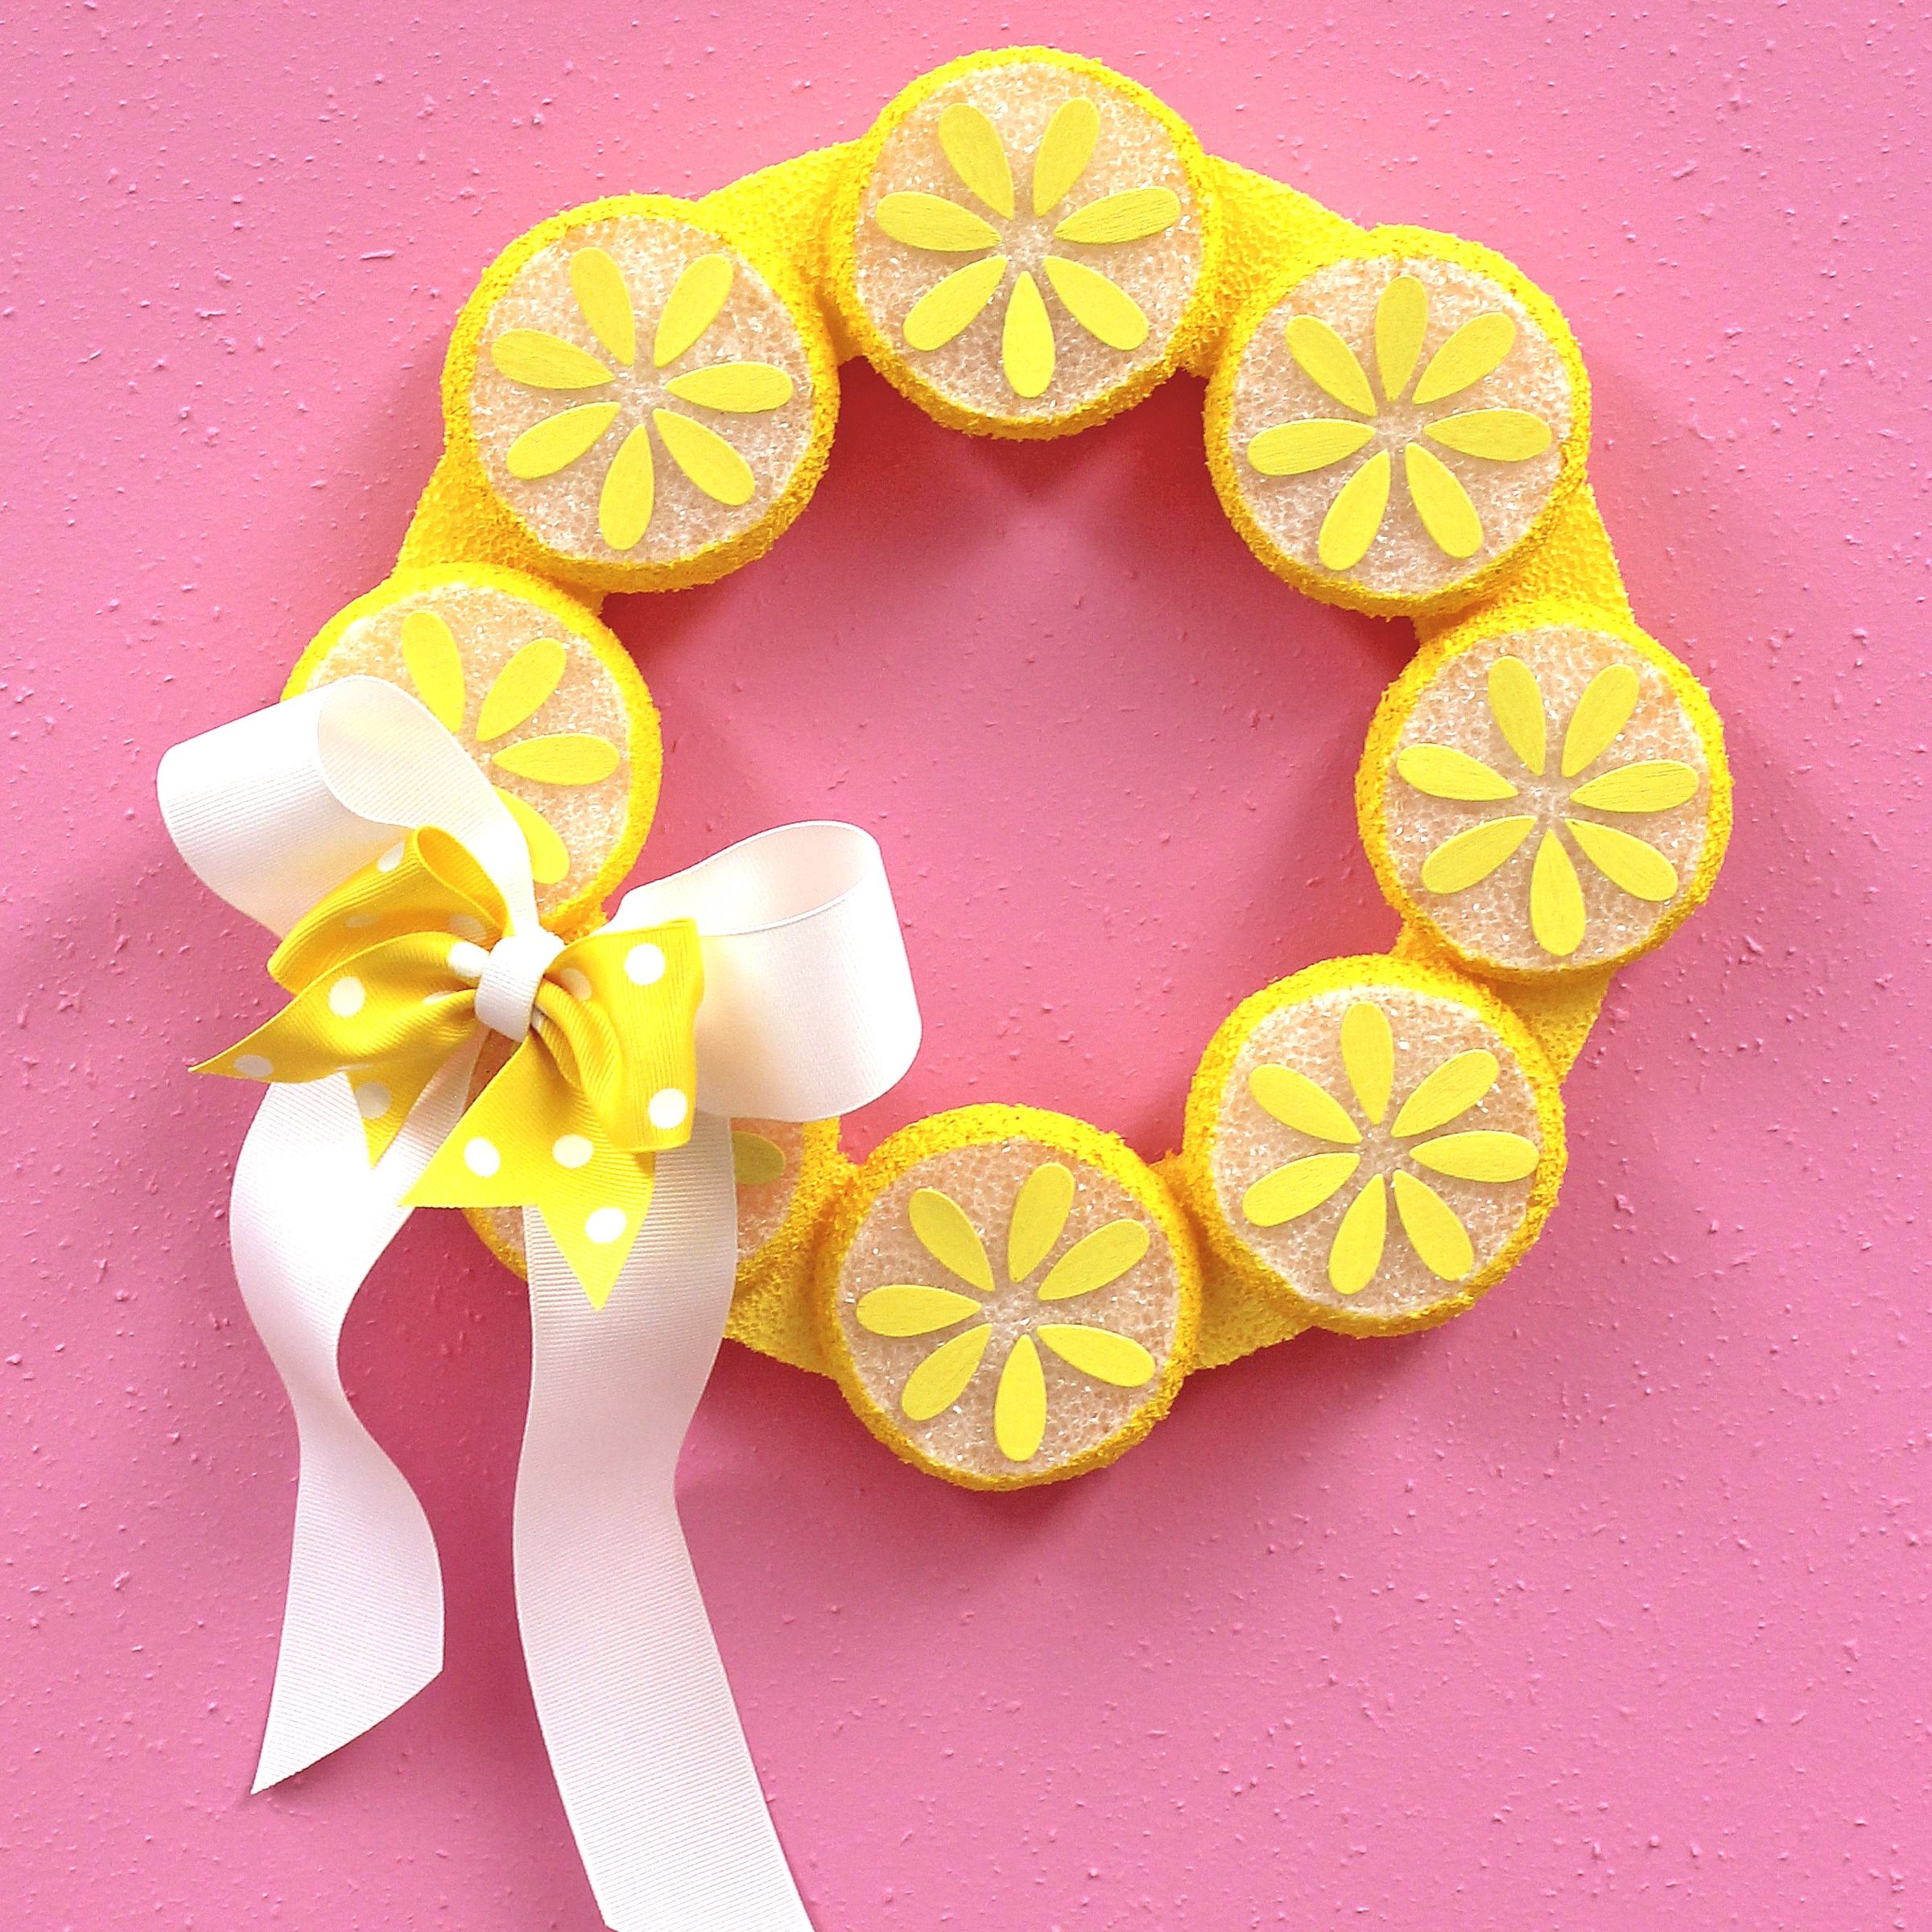
- For lemon slice, place one Foam Ball on the cutting mat and use a serrated knife to cut in half. (Tip: Roll the ball as you press the knife blade into the ball, watching that it is creating two equal halves. When you reach the beginning, saw back and forth to finish cutting.) With one half, cut off a 1/2″ slice. Set aside the rounded part for another project or discard it. Repeat with another half of the Foam Ball. Then, repeat with the other three Foam Balls.
- To smooth and round edges, press the Foam edge down onto the table with even pressure. Roll slice all around to smooth. Repeat with other edge. Then repeat with the side, positioned at an angle on the table to keep the angled look. Repeat with the other seven slices.
- Position slices with a smaller, flat surface up (so that sides show.) Squeeze yellow paint onto a paper plate. Use a paintbrush to add a bit of water to thin and stir. Paint sides and backs of slices (but not front). Also, paint Foam Wreath. Let dry.
- Also paint wood teardrops yellow. (Optional: To hold teardrops while painting, remove the backing from Contact® paper and place onto cardboard, with sticky side UP. Use tape in a couple places along each edge, wrapping around to the back of the cardboard to hold. Set teardrops onto a sticky surface, an inch or so apart, and paint. You don’t have to be careful in painting. Let dry and then remove from Contact® paper.)
- Use white craft glue to attach seven wood teardrops to the front (unpainted surface) of each slice. (Tip: Hold eraser end of a pencil in the center and have points of teardrops radiate out.) Let dry.
- Evenly position all slices onto a wreath. Then, glue with a glue gun.
- Cut 3″ from white ribbon and set aside. To make a white bow, place 30″ length ribbon horizontally on a table. Bring in both ends, overlap in middle, making an X. Grasp the middle and bind with a twist tie. Diagonally cut tails. Similarly, make a bow with a yellow ribbon, cutting V-notches in tails. To cover the bound center, fold 3″ white ribbon into thirds, lengthwise, and hot glue to hold. Wrap around center, trim, and glue ends so they just meet on the back of bow. Then, glue yellow ribbon to center of white one and glue to bottom left of wreath as shown.
- For hanger on back, slightly separate ends of large paper clip, approx. 1/4″. On the top back of wreath, insert the shorter end up into bottom edge of the wreath, creating a hanger loop with the longer end. (Hot glue if loose.)
-
 Birthday Gift Tumbler MugSkill level: Beginner
 -
 Birthday Era GarlandSkill level: Beginner
 -
 Kitchen Word ArtSkill level: Beginner
 -
 Front Porch ReindeerSkill level: Beginner
 -
 Disco Party DécorSkill level: Beginner
 -
 Jute Covered Disc Wall DécorSkill level: Beginner
 -
 Fabric Ruffled Chicken DecorSkill level: Beginner
 -
 Garden Bug FriendsSkill level: Beginner
 -
 Long Legged SpiderSkill level: Beginner
 -
 Glitter Anchor DécorSkill level: Beginner
 -
 Gold Glitter StarSkill level: Beginner
 -
 Haunted Mantle DecorSkill level: Beginner
 Subscribe


