

Supplies
- FloraCraft® SmoothFōM®:
- 2" Ball - White
- Acrylic Paint:
- Blue
- Yellow
- Pink
- Orange
- Red
- Glitter - Clear
- Paper Cone Cups
- Bakers Twine
Tools
- Low-Temp Glue Gun
- Scissors
- Paint Brushes
- Toothpicks
- Scrap Piece of Foam
Instructions
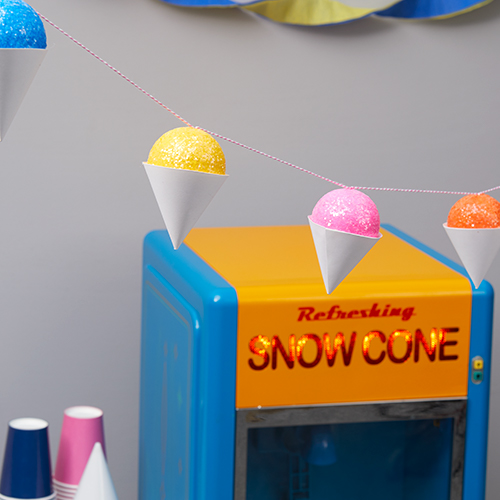
1. Lay the desired number of balls spaced apart how they will be hung on the garland. Decide which color the balls will be painted. Decide how many of each color will be needed.
2. Push a toothpick into each ball. Use the toothpick as a handle while you paint. Paint the balls in the desired colors. While the paint is still wet sprinkle the tops of the balls with glitter. As the paint dries it will secure the glitter in place. Push the toothpicks into the scrap piece of foam to dry.
3. Cut down the side of the paper cone cups and lay them out. Cut the cones down to about 3”. Glue the cone back together with about a 2” opening to fit the balls. Glue the balls into the paper cups.
4. Lay the snow cones spaced apart by color how they will be hung on the garland. Cut one end of a toothpick off so it has a blunt end. Use the pointed end to poke a hole in the top of the snow cones. Wiggle the toothpick around a little bit to make the hole slightly bigger. Measure out about 12” from the end of the twine. Use the blunt end of the toothpick to push the twine into the hole. Repeat to string the rest of the snow cones.
5. To secure the twine put a small dab of glue over the hole. While the glue is still wet sprinkle glitter to conceal.
-
 Birthday Gift Tumbler MugSkill level: Beginner
 -
 Birthday Era GarlandSkill level: Beginner
 -
 Kitchen Word ArtSkill level: Beginner
 -
 Front Porch ReindeerSkill level: Beginner
 -
 Disco Party DécorSkill level: Beginner
 -
 Jute Covered Disc Wall DécorSkill level: Beginner
 -
 Fabric Ruffled Chicken DecorSkill level: Beginner
 -
 Garden Bug FriendsSkill level: Beginner
 -
 Long Legged SpiderSkill level: Beginner
 -
 Glitter Anchor DécorSkill level: Beginner
 -
 Gold Glitter StarSkill level: Beginner
 -
 Haunted Mantle DecorSkill level: Beginner
 Subscribe


