

Supplies
- FloraCraft® CraftFōM®:
- (3) 1x12x18" Sheets - White
- FloraCraft Smooth Finish®
- Acrylic Paint:
- White
- Black
- Bright Blue
- 1/2" Thick Rope
- T-Pins
Tools
- Foam Cutter
- Protective Gloves
- Low-Temp Glue Gun
- Wood Graining Tool
- 1" Flat Paint Brush
- Ruler
- Black Marker
- Craft Spatula
- Fine Grit Sanding Block
Instructions
1. Lay the ruler across the 12″ end of the foam sheet. Make a mark every 4″ with the black marker to create the boards. Do this at both ends of all three foam sheets. Lay the ruler with the marks at the top and bottom of the foam sheet. Hold the ruler tightly to the foam and use it as a guide as you cut the boards from the sheets. You only need eight 4×18″ foam boards; save the remaining foam for a future project. Lightly rub the cut edges together side by side to lightly sand the edges smooth, and remove the loose foam particles.
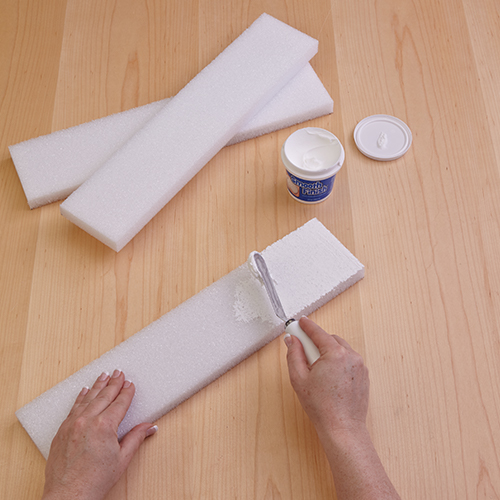
2. Wear protective gloves with working with Smooth Finish. Apply one coat of Smooth Finish to the top and sides of all the foam boards. Apply the Smooth Finish in all directions being sure to fill the cells of the foam. Let dry.
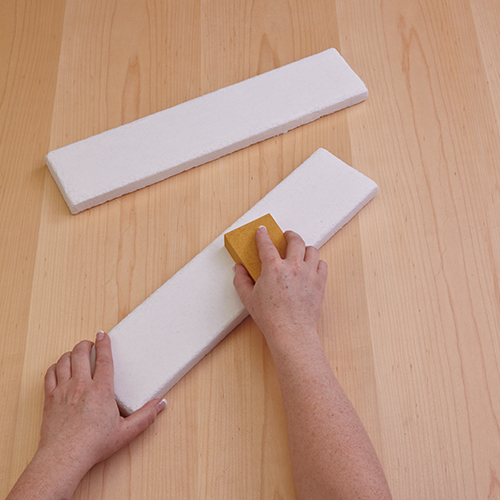
3. Sand the boards lightly with the sanding block until smooth. Apply a second coat of Smooth Finish to the tops and sides of all the boards. Let dry—sand boards for a completely smooth finish.
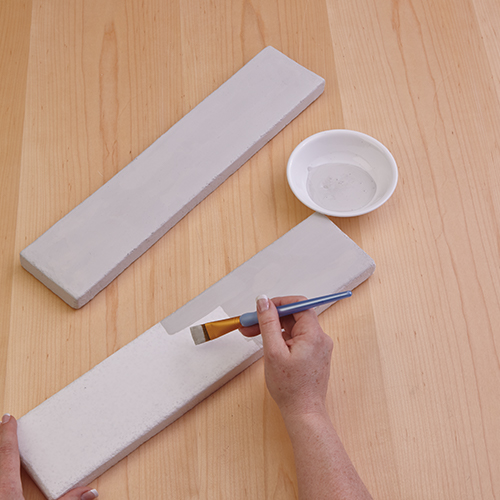
4. Base Coat: Mix a very small amount of black paint with white paint to create a very light gray. Coat all the boards with light gray paint and let dry.
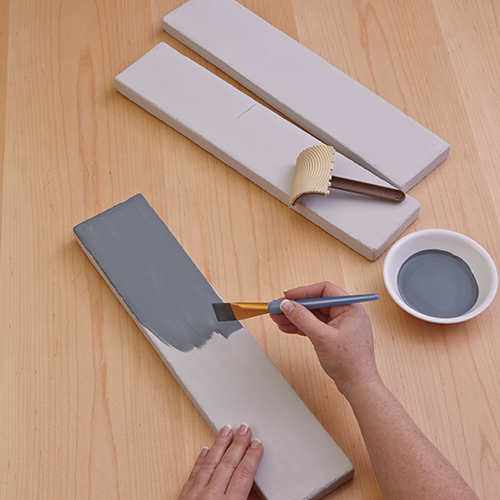
5. Graining Coat: Mix the black and white paint to get a medium/dark gray. Add enough bright blue paint with the medium/dark gray to give it a slight blue hue. Add a little water to thin the paint slightly. This will make it easier to work with and give you a little longer dry time. Be sure to mix enough of this color to have enough for all of the boards. Working with one board at a time, apply a generous coat of the darker gray paint.
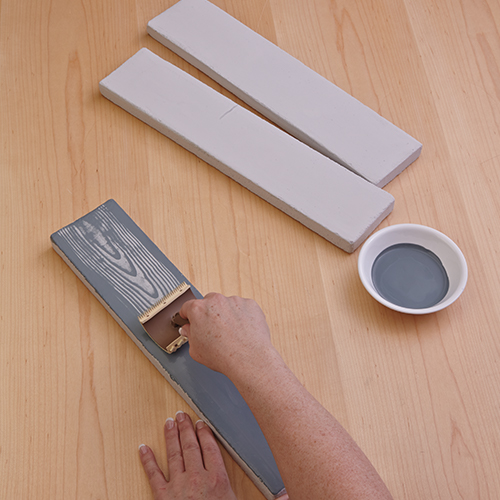
6. While the paint is still wet, place the graining tool at the end of the board. With slight pressure, begin pulling the tool towards you slowly. Rock the tool gently up and down as you pull. It is best not to stop while using the graining tool. Pull from one end of the board to the other end in one smooth motion. Do not panic if you mess up or don’t like the way it looks. While the paint is still wet, wipe the dark gray paint from the board with a wet paper towel. Let the board dry completely and try again. Let all boards dry completely.
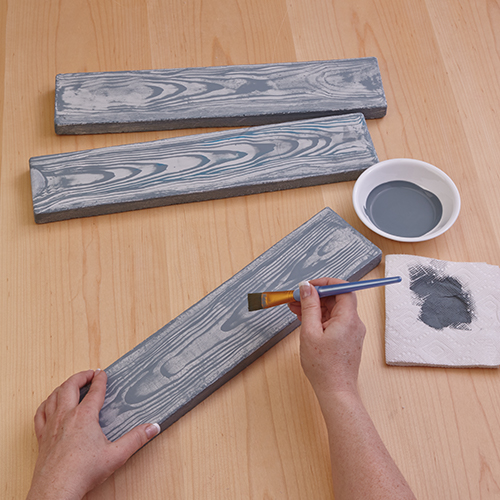
7. Using a dry brush technique, lightly brush each board with dark gray paint to enhance the realistic wood grain look. Load a small amount of paint on your dry brush, and then wipe off excess on a paper towel. Hold the brush horizontal to the board and lightly brush across just the raised areas of the board. You will notice that the graining tool left texture in the paint. This technique will bring out that texture.
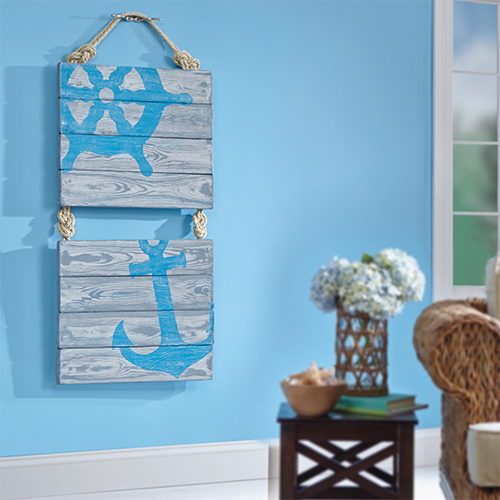
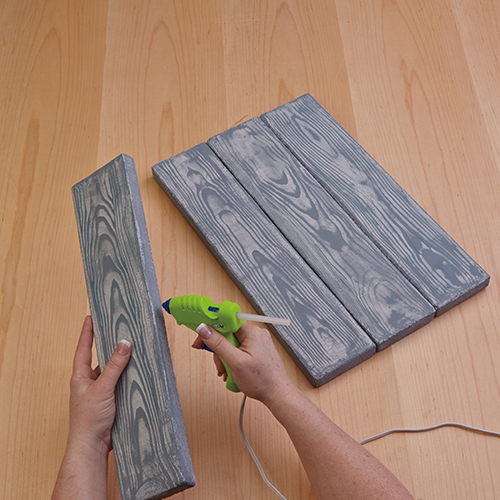
8. Glue the boards together with the glue gun. Glue them in two sets of four, side by side, as shown.
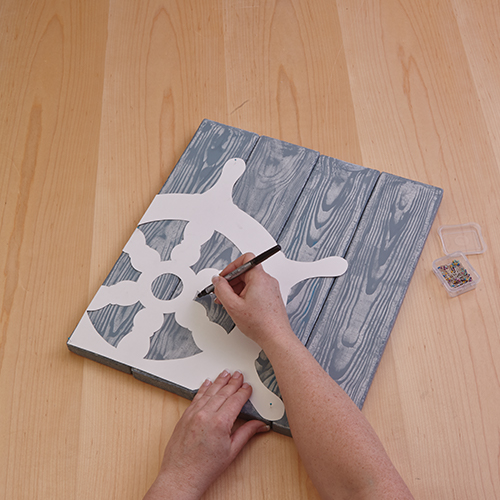
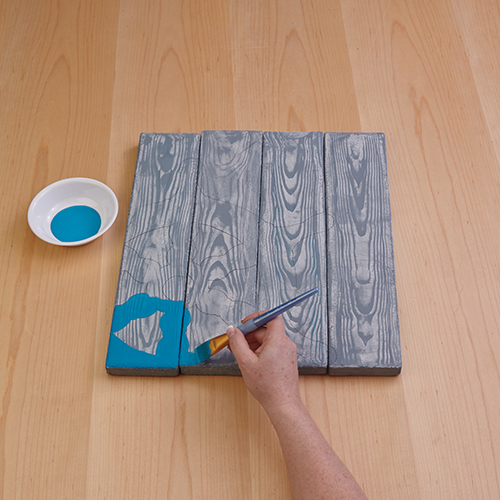
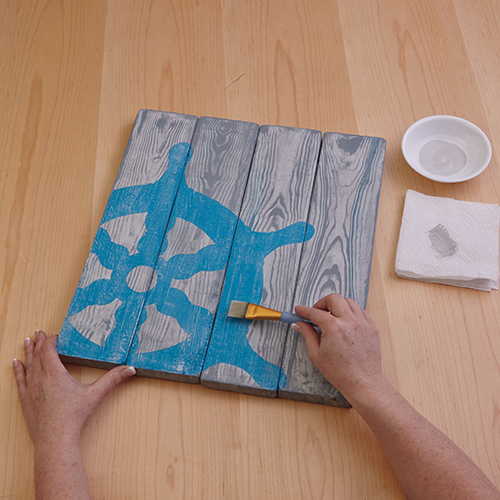
9. Trace the templates onto the boards. Paint the traced shapes with bright blue paint. Let dry completely.
10. Use the dry brush technique again, with the light gray paint used to base coat the boards to add a weathered appearance.
11. Using two 18″ pieces of rope for each knot, tie an infinity knot or figure eight knot, as shown, to connect the two pieces pallet. Lay the rope pieces together side by side and tie the knot. Trim the tails of the rope to 4″ on each side of the knot. Glue and pin the rope tails to the back of the pallets. PIn at the bottom of the top pallet section and at the top of the bottom pallet section to connect them.
12. To create the hanger, use two 36″ pieces of rope. Lay the rope pieces together and tie an infinity knot in each end. The distance between the two knots should be about 18″. Trim the tails to 4″ at each end. Secure the hanger to the back to the top pallet section using the low-temp glue gun and t-pins.
-
 Birthday Gift Tumbler MugSkill level: Beginner
 -
 Birthday Era GarlandSkill level: Beginner
 -
 Kitchen Word ArtSkill level: Beginner
 -
 Front Porch ReindeerSkill level: Beginner
 -
 Disco Party DécorSkill level: Beginner
 -
 Jute Covered Disc Wall DécorSkill level: Beginner
 -
 Fabric Ruffled Chicken DecorSkill level: Beginner
 -
 Garden Bug FriendsSkill level: Beginner
 -
 Long Legged SpiderSkill level: Beginner
 -
 Glitter Anchor DécorSkill level: Beginner
 -
 Gold Glitter StarSkill level: Beginner
 -
 Haunted Mantle DecorSkill level: Beginner
 Subscribe


